Setting Up
No matter what you are told, ignore the contents of the SD card which comes with your Pi. You can mostly ignore the little booklet which comes with it (assuming you purchased a kit and not a bare Pi.) Yes, there are a few things worthy of note in it, but some of it can get you into real trouble.
The first thing you want to do is visit the Raspberry Pi Download site and pull down the latest Raspbian zip file. Depending on how inventory was managed at the retailer, what you have could be horribly out of date. The file I pulled down was the Jessie file from 2016-05-27.
 Once you have unzipped the IMG file, insert your microSD card via whatever adapter is necessary and right click on the IMG file. Choose “open with disk image writer” and be sure to target your microSD card. Targeting the wrong drive will make you a very unhappy programmer. Once you have done this you should see something which looks much like the image shown here.
Now you are all about to learn one of the many reasons Stephen King stopped writing a novel a chapter at a time on-line and why most “journey” type blog posts can be worse than useless. Revision. Yes, I know people who will go back and hack and hack at a blog post no matter how many people have already read a previous version. I will only hack at it before I leave the blog editor. Some of my RSS feed subscribers are all too aware of this most likely. Upon rare occasion they will get a new post followed by 1-3 “updates” within the same half hour if I happen to notice something missing or not correct. Usually it is something I can save for another post. When you purchase a completed book, all of this revision has been hashed out before the plates were set to print. You get a near perfect journey, at least until the next software release comes out and invalidates some of the steps.
We have already covered hardware, yet need to speak a bit more on it. I also need to rant about blog sites which do not include a search feature. The blog site for Chalkboard Electronics is one such site. I could not find printed documentation so I went to their site. I had to scroll backwards skimming through every article to find this one which identifies all of the connectors.
Thankfully they ship this thing configured to use the external power supply which also ships with it. Had it not been configured that way I probably would have fried it. No, I did not short any pins or follow their firmware update procedure. If I notice any issues I will need to revisit this post to find the link with the procedure to follow.
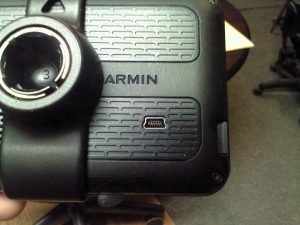
 My kit did not include the cable needed for the touch screen. This takes a mini-USB cable which happens to be the same thing my Garmin uses. Those USB 2 to miniUSB cables were popular back in the day. I used to have a cell phone which used them for power so I have a few laying around.
I could not find my cool dual row spike arrestor. Besides accumulating many cables one does not need being a traveling consultant, one also loses a great many things. I lost a Black & Decker cordless drill and bit set on my last gig. Pretty certain I left it in a closet at the extended stay hotel and naturally it never landed in lost & found when I called. Either the cleaning crew found it in the top of the closet or one of the next guests to have the room got a bonus.
 Why am I mentioning the spike arrestor? Because it was perfect for dealing with all of these power converting plugs we now have to content with. Instead I had to daisy chain from another power strip. Yes I shut the things off at night so as to not completely violate building codes. Besides, I don’t want my stuff to cook when I’m at home in bed. It is much more horrifying to see “magic smoke” rising while you are using something.
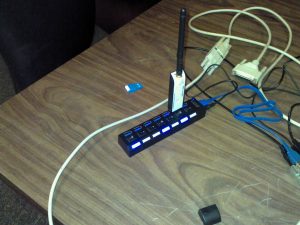
 Once you have everything hooked up and your newly created microSD card inserted into your Pi you are ready for your first boot. I did not wish to drag a cable across my office floor for a hard wired network connection, so, I plugged in a wireless adapter via a USB 3 powered hub. The Pi did not seem to auto-load the wireless drivers but a reboot with that powered on took care of the problem.
Laugh all you want about that funky looking wireless adapter with an antenna. The thing works an is so old every Linux distro on the market has drivers for it. When dealing with Linux newer hardware isn’t always better hardware.
Once booted and connected to a network with Internet access you need to open a terminal window and issue the following commands:
sudo apt-get update

sudo apt-get upgrade

sudo apt-get install synaptic
Depending on your network speed and how old your IMG file was the upgrade stage can take quite a while.