There have been a great many attempts to get a Linux distro up and running on the Nextbook Flexx. While I hate anything to do with Walmart I ended up getting one of these devices a few months ago because a client wanted software tested on it. Once that was done I had no use for it.
Let me start by saying I have been unsuccessful and so has everyone else as far as I can tell. Things are getting closer. I’m going to relate the process I went through with the Elementary Linux distro in hopes others will continue the effort. My Nextbook has had Windows 10 installed on it so you may wish to do that prior to attempting the Linux installation. I do not know if these instructions work for Windows 8.1.
To start with I purchased a generic 64Gig MicroSD card.
The SD card inserts into an almost hidden place on the back of the tablet.

Next I used a generic 2Gig thumb drive and RUFUSed the 64-bit Elementary distro onto the thumb drive. Once that was done I had to open the contents of the thumb drive and navigate to the EFI directory where I copied in bootia32.efi. This is the same directory you find the 64-bit efi boot file. This computer is like many frustrating devices. A 64-bit computer with a 32-bit UEFI.
Booting from the thumb drive is a bit of an ordeal. You must boot the Nextbook to Windows and log in. Then you need to use the little “stack” icon in the upper left corner of the screen.

After touching that you are greeted with a menu on the left side of the screen. You need to select the Settings entry near the bottom.

On the settings screen click or tap your way into the search bar and type uef. You should quickly see a single menu option appear in the results. It says something like “Change advanced startup options”

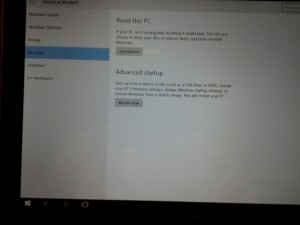
The new screen will have some tabs down the left side. Be sure to select the “Recovery” tab. There you want the second option of “Restart Now” Be sure your thumb drive is inserted into the correct slot and you are connected to power. Do not try to install a Linux distro while running on battery. The hardware power settings will power down the machine long before the installation completes.
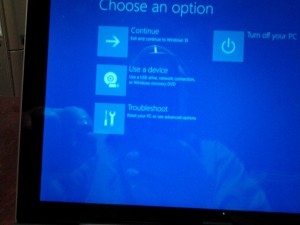
It will take a bit after clicking “Restart Now” but you will eventually be greeted with another blue menu.
 You want the “Use a device” option in the middle on the left. This will bring up another blue menu.
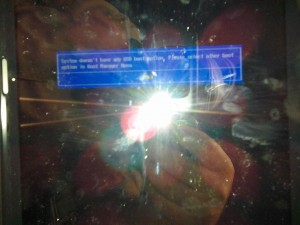
 Select the first option “EFI USB Device”. Your machine should then attempt to reboot using the USB drive. If you get some funky looking DOS style message box
 You either have an incompatible thumb drive or, more likely, you forgot to copy a 32-bit EFI boot loader into the appropriate EFI directory. You have to fix your thumb drive and start over.
If your machine simply restarts into Windows, most likely “Secure Boot” has been turned on. Follow the instructions above, but instead of selecting to boot from USB select “Troubleshoot” then navigate through changing EFI settings to disable secure boot.
Select the “try” grub menu option so you have graphical installation and the ability to fix screen orientation. Once the main screen is up click on the Applications label in the upper left corner of the tablet and click in the search bar. Type display and select the display option.
Elementary is very frustrating when it comes to changing display rotation. Unlike Ubuntu 15.10 Gnome where you can simply tap the display icon to see a settings menu, here you have to use the mouse and click the almost impossible to see “gear” icon inside of the display icon. A menu drops from it with two entries. The bottom is a drop down for screen rotation. Choose clockwise to get standard notebook/laptop orientation.
Other than that, installation went without a hitch. I selected the SD card for installation and left the default boot drive for boot information to be placed. That said, it did not boot. My first thought was the 32-bit boot loader was not copied. After Windows came up and I got logged in I followed the above procedure to get to “Troubleshooting.” From there I chose “Advanced Options” and “Command Prompt”. Basically I stole some knowledge from here. Be sure your thumb drive is still inserted before doing the following at the command prompt. Also be certain you have caps lock turned on because the commands don’t work in lower case.
LIST DISK
SELECT DISK 0
LIST VOL
You will find your thumb drive is listed as D and that there is a volume without a drive letter which is 100Meg in size. That volume is your EFI boot area.
SELECT VOLUME 2
ASSIGN LETTER K: do not forget the colon
EXIT
Now, with caps lock turned off type the following:
dir k:\EFI\ubuntu
dir d:\EFI\BOOT
copy d:\EFI\BOOT\bootia32.efi k:\EFI\ubuntu
The name of your 32-bit boot loader may be different.
exit
Now power cycle the computer.
This still doesn’t make it bootable, but it appears to be much closer. One thing I have not tried, because it would suck, is to install the boot loader on the SD card during installation. What makes me think this might function is the fact, once you have installed, when you follow the instructions above to navigate to the “EFI USB Device” menu entry, you will see a new entry for “ubuntu”. Selecting it currently doesn’t work, but, probably would if the boot loader had been installed on it.
The reason that method would suck is one would have to boot Windows, log in, do the above navigation to get to that device menu, then reboot to Elementary/Ubuntu (Elementary is Yet Another uBUntu [YABU] with a nicer desktop) every time you wanted to use Linux. I may have time this weekend to try it, but, as I said, it would suck, so I’m not that interested. What I want is a solution for a true “Dual Boot” option using Grub.
Related posts:
