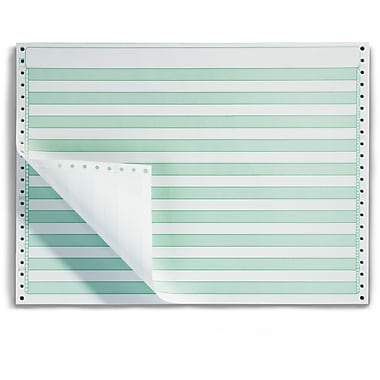
With just a tiny bit of effort you can get something close. When you are in your dashboard and hover over “Appearance” a sub-menu displays the “Customize” entry. Somewhere on the left of that screen will be the “Additional CSS” entry. There you can hack your current theme (somewhat) without hacking your current theme. You can override some very specific things, depending how deep into jQuery your current theme went to implement features.
Let’s take a look at the CSS code we need for a simple attempt at green bar.
code, pre {
    word-wrap: 0;
    white-space: pre;
    overflow: auto;
    line-height: 25px;
    padding: 2px 8px;
    margin-bottom: 10px;
    border: 1px solid #333333;
    background: linear-gradient(to bottom, #e6ffe6 50%, #FFFFFF 50%);
    background-size: 50px 50px;
   max-height: 500px;
}
Word of caution. Your current theme might have really pooched one or more of the tags. I had to use the <pre> tag above because the <code> tag is royally hosed in my current theme. How hosed you ask?
code, pre {

word-wrap: 0;

white-space: pre;

overflow: auto;

line-height: 25px;

padding: 2px 8px;

margin-bottom: 10px;

border: 1px solid #333333;

background: linear-gradient(to bottom, #e6ffe6 50%, #FFFFFF 50%);

background-size: 50px 50px;

max-height: 500px;

}
Nice, huh?
Yes, I could have spent days trying to figure out what got inherited where using Firefox’s “Inspect Element” option and hacked out 2 different styles for code and pre. Maybe code would then work as expected. That would be wasting quite a bit of time though. I need to educate the script kiddies who never worked with green bar. Hopefully you clicked on the image and zoomed the page as much as physically possible so you could see that isn’t just some “design” along the right and left edge. Usually it is 2 different sets of line numbers because band printers generally had 2 different LPI (Lines Per Inch) bands. Unlike most of the green bar things we see on-line today, with one color per line, the green bars were typically 1/2″. (Yes, there were also blue bars and I seem to remember seeing a box or two of gray bars.) Most real line printers accepted bands with different character sizes which required you to toggle the LPI switch usually between 6 and 8. If everything was right with the world, you would get exactly 3 lines in each bar at 6 LPI and 4 and 8 LPI. Keep in mind 8 was a bit hard on the eyes so it was used sparingly by most shops. The two different sets of line numbers are for the two different LPI. They also helped the lowly computer operator get the form lined up correctly in the printer. When loading paper into the LP27 back in the day I would line the perf up where I “thought” it was supposed to be, then tapped the “test pattern” button, let it print a few lines, tapped the button again to stop the test pattern, checked the placement against the pre-printed line number, made any needed adjustments, then hit “formfeed” and tapped on-line.
A few months into my computer operations career I could skip the test pattern step with green bar and a few other forms because I _knew_ exactly where the perf needed to be placed in the printer.
Please take a look at this site for an example of greenbar which went farther. They used a table though so not a generic solution.
Here is another solution I have not played with.